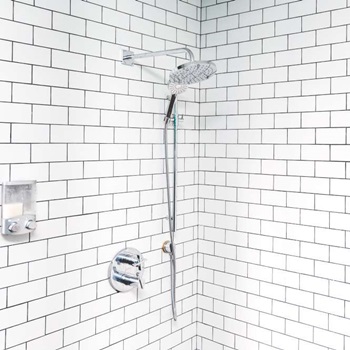
Only the best grout for showers can truly make your bathroom look and feel sparkling clean. No amount of shower head scrubbing makes a difference if the white spaces between the tiles are all brown and icky.
There are plenty of products on the market right now, so picking out the grout that works great in your bathroom is not easy. That’s why we have put together a few reviews, along with some advice on how to choose and maintain the shower grout.
See The Quick Comparison Chart
What Is a Shower Grout?
 Shower grout is something that you use to fill the spaces between the tiles in your bathroom. This way, you ensure that you protect the walls and floors from any leaks or water damage. Since you cannot put the tiles too close to one another (as it might damage them in the long run), you need something to cover that area – and while you are doing this, you also make that area more aesthetically pleasing. It all depends on the type of grout that you purchase.
So why is grout actually important? Well, when you are remodeling the bathroom, there seem to be like thousands of decisions that you have to do – one of them being the grout. This is a crucial part of bathroom remodeling that most seem to either ignore or simply skimp over. It’s the tile that’s actually important, right?
Wrong. If you look at it from a perspective, the grout is just as important as the tile. Tiles are there to look pretty and repel the water – and they do a very good job. However, if water enters through the tiny spaces between the tiles, then the walls are certainly compromised. If the mold gets in there, your only way to eliminate it would be to remove the tiles – which would not only be troublesome, but expensive as well.
If you apply grout for the shower areas, for example, you will be able to seal out the water and the dirt, making up for all the differences between the tiles. It will also firm up the structure or a particular installation, ensuring that it stays put for a long time – or at least until you want to break it down.
Grout is good and is certainly a very important decision to make. It may be treated as an installation afterthought – but in truth, it should be given much more attention. If you don’t do it right, it might end up being quite difficult to fix.
Sanded Grouts vs. Unsanded Grouts
When you are going to buy one, you have to choose between sanded or unsanded grouts. It may be “just grout”, but this decision is actually of extreme importance – and should certainly not be overlooked. Let’s just look at a few differences between sanded and unsanded grout.
1. Sanded Grout
 Sanded grout is generally the main choice that people go for when remodeling their bathroom, mainly because it is cheap and offers a fairly good lock. It’s great to use on the bathroom and kitchen floors, as well as the shower pan – but it is not as efficient when it comes to the bathroom or shower walls, or even honed stone.
Essentially, sanded grout is a cement-based grout that contains silica sand, chemicals, and inorganic aggregates. It’s perfect if you wish to create wide grout lines, and the sand’s ability to lock will offer you a very sturdy joint.
Sanded grout is less expensive mainly because sand is a cheap kind of filler. Plus, due to the fact that sand is porous in nature unless you modify it, sanded grout will require sealing. This will keep the water from getting into the back of the tile, damaging the substrate.
In a nutshell, the advantages of sanded grout are that its costs less, it offers denser joints, and it also provides slightly more choices of colors – which is great if you have a particular color in mind. However, the drawback is that its porous consistency can scratch surfaces, and it might also be difficult to squeeze in a thinner seam. Also, without a good sealer, this will not keep the floors safe from water.
2. Unsanded Grout
As its name suggests, unsanded grout (also called non-sanded grout) has no sand in it and is generally perfect for delicate tile surfaces and thin grout lines. While sanded grout is not suitable for bathroom and shower walls, unsanded grout is. It can go through thin lines, and its consistency makes it easy for you to work it around a vertical surface.
This grout does not have any silica aggregates in its formula – which means that it is perfect for any surfaces that are more fragile or scratchable. You may use it with glass, ceramic, marble, metal, or even natural stone tiles.
The overall good side of this kind of grout is that it has a lesser stump on a vertical surface. Also, besides the fact that it preserves the sensitive tile surfaces, you won’t need any sealants to work with it. The problem is that it is more expensive than your typical sanded grout and it can slump when you apply to wide seams. Moreover, you do not get as many color choices.
The verdict is that sanded grout should be the main choice when you have to tile the floors and walls, as it has many color choices and it’s fairly affordable. However, unsanded grout is the more suitable choice for walls, as it can enter the fine seams – and it is not as rough on the fragile tile surfaces. It is much easier to apply, which is great if you are not exactly an expert in the matter.
Grout Types And Uses
When it comes to grout, there are two options that you may go for, epoxy and cement. Both have their own additives and consistency – and they are used for rather different things. Here are the types of grout explained, so that you may choose for yourself which one to use in your bathroom.
1. Epoxy Grout
 Containing a mix of several resins with a filler powder (hardener), epoxy grout is generally full of strength and very durable. It is not among the most affordable kinds – but besides its hardness, it also has immunity to greases and most strong acids.
This type of grout naturally resists well to water and repels the formation of mold – which is why it does not require a sealant. Plus, since the formula is rather quick-dry, you do not have to wait for long until it dries out. This can be a very important aspect if you are pressed by time and you need some quality work done at a quicker pace.
Epoxy grout can be bought in both sanded and unsanded versions. Some of the new epoxy grout generations also include detergent in the hardener, making it much easier for the contractor to wash off the excess grout. This will improve the workability so that you do not have to end up scrubbing for hours at the tiles.
This grout is very hygienic, compared to other grouts. Since it doesn’t absorb any water, it also does not harbor bacteria – which means that with regular cleaning, your bathroom should be safe and good-looking.
However, one disadvantage of epoxy grout is that it can be fairly difficult to apply – which can make the entire tiling process a rather messy one. For this reason, you might want to get a skilled professional, to reduce the mess to a minimum. Still, it does not require any sealant – therefore, cutting off from the hassle of the grouting.
2. Cement Grout
Cement grout is easier to use compared to epoxy grout, which is why many people prefer this version. It is the most common type of grout that you’ll see in most bathrooms – and it is also very affordable, considering that you get such quality from it.
Cement grout can also be bought in sanded and unsanded versions, which you can choose based on the width between your tiles. However, since it is much easier to apply, cement grout is more suitable for wall grouting.
The disadvantage of this kind of grout is that its porous surface will make it very prone to peeling. For this reason, you will have to seal the grout as soon as it dries – to prevent that from happening. You also need to choose the sealant accordingly, to ensure its durability.
There are two types of grout sealers: the membrane-forming type, and the penetrating type. The former is generally prone to getting cloudy or peeling when the residual moisture from the underlayment or mastic pushes against the tile. On the other hand, the penetrating sealer will still breathe after it gets soaked into the grout and tile – which is why it is the preferred option.
Best Grout For Showers Comparison Chart
| PRODUCT | DETAILS | ||
|---|---|---|---|
 | Red Devil 0425 Pre-Mixed Tile Grout Repair Squeeze Tube, 5.5 oz, White |
| View On Amazon |
 | Custom BLDG Products NSG1221-4 Linen Non-Sanded Grout |
| View On Amazon |
 | Red Devil 0428 Pre-Mixed Tile Grout, 1-Pint, White |
| View On Amazon |
 | Perma Tile Grout Waterproof Tile Grout |
| View On Amazon |
 | Laticrete SpectraLOCK Pro Premium Mini Parts A&B, 2lb (0.9 kg) |
| View On Amazon |
 | Red Devil 0438 House & Home Restore 438 Pre-Mixed Tile Grout |
| View On Amazon |
 | Custom PMG165QT 1-Quart Simple Premium Grout |
| View On Amazon |
Best Grout for Shower Reviews
1. Red Devil 0425 Pre-Mixed Tile Grout Repair Squeeze Tube, 5.5 oz, White
The brand may be called “red devil” – but this one is very nice and white. If you need your bathroom to look good and elegant, then this one is a very suitable choice. Plus, if you require some kind of custom shade, you may also mix it with acrylic paint or other dyes to give it a splash of color.
This grout is premixed – meaning that you may easily apply it straight from the moment it comes up your doorstep. Moreover, you will not have to worry about creating any mess. With its relatively thin applicator head, you may easily apply it between ceramic and mosaic tiles.
This grout is highly mildew and water-resistant, which is why it is perfect for use in the bathroom. Moreover, if you apply it properly, all you need is to wipe the tiles before they get completely dry. Make sure not to use a rough sponge and wash gently, so as to not damage the grout.
Pros
- Ready to use from the moment you take it out of the package
- It cleans up very easily with water and soap
- Its application is quick and simple
- It dries very fast
Cons
- Since it dries very quickly, you might have to use it right away
- It tends to crack and peel off rather fast, compared to other grouts
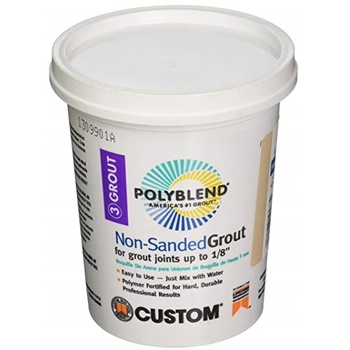
2. Custom BLDG Products NSG1221-4 Linen Non-Sanded Grout
If you have quite some work to do and a lot of tiling to resolve, you might want to try this grout. At 1 lbs, this one is more convenient for larger spaces – for example, when you have to grout an entire bathroom. All you have to do is mix it with some water and you should be good to go.
This mix is unsanded, which makes it perfect for tiling the lines of your shower walls. It can go through tight tile lines – and if you have decent skills at applying grout, it will also be relatively mess-free.
The color is almost white – specifically, a linen-color. This should work well when you are looking for a slightly tan color that you do not want to be white, but don’t need it to be cream either.
Pros
- Very easy to use and apply
- Easy to mix and clean after the job is done
- Affordable price, considering the quantity
Cons
- The color looks almost white when it is dry
- It gets dirty rather quickly
3. Red Devil 0428 Pre-Mixed Tile Grout, 1-Pint, White
If a small tube of pre-mixed shower grout is just not enough for you, then you might want to try out this one. At one pint, this should be just enough to grout an entire bathroom. Plus, considering that the grout has been pre-mixed, you won’t have to waste a lot of time and effort in mixing it yourself.
One advantage of this product is that it’s highly mildew and mold-resistant, it’s perfect if you want to use it straight in the shower area and around the shower valve. This way, even if water falls continuously on its surface, it will still protect your walls for a fair amount of time.
This grout is easy to apply– which means that you can apply it yourself. Plus, even if you end up making a bit of a mess, it is easy to clean it as well. Just make sure that you remove the “bulk” from the tile before it dries completely.
Pros
- Easy to clean from the tiles and to even out
- Can adhere to a variety of surfaces
- Can be easily applied, even if you are no expert in home renovation
Cons
- Slightly expensive
- Has a fairly long curing time
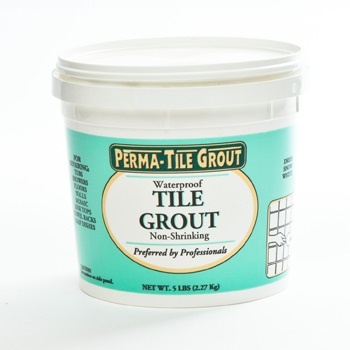
4. Perma Tile Grout Waterproof Tile Grout
This one is popular when it comes to bathroom tiling, and many people claim that it has all you need to get your bathroom done flawlessly. Top-quality and waterproof, this is seemingly the one that is used by many professionals in the field.
Compared to other brands, this one can last for a very long time – even with regular cleaning. It may start peeling at some point – but compared to other grouts, it has a very long life.
Plus, despite the fact that professionals use it the most, it is still very easy to mix – making it perfect for beginners as well. It also has a fine consistency that allows you to easily apply it – regardless of your knowledge in home renovation.
Pros
- It dries up fast
- It’s very easy to clean
- The consistency is fine and can be very easily applied
Cons
- The instructions on the packaging are not very clear
- Compared to other grouts, this one is fairly expensive.
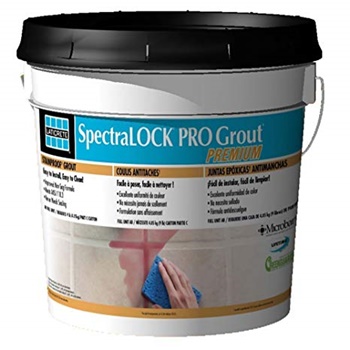
5. Laticrete SpectraLOCK Pro Premium Mini Parts A&B, 2lb (0.9 kg)
Looking for a small quantity of grout to patch a few things up in your bathroom? In this case, at 2 lbs, this might be exactly what you need. You may use it to fix any peeled grout from your shower fixture areas.
Once this grout has cured, it is completely waterproof. Moreover, it also has antimicrobial properties that will keep the formation of mold and mildew at bay – making it easy to clean and maintain as well.
If you follow the directions, the grout is very easy to apply – and once you have done so, it cures quickly. Many users say that it takes about 30 minutes for the entire composition to cure. This is a very convenient aspect if you do not have the time to wait around for the entire thing to cure.
Pros
- It is applied easily if you get the composition right
- Compact and perfect for small jobs
- Color matches from batch to batch
- Dries quickly, making it perfect if you need to get the job done fast.
Cons
- Since it dries quickly, you also have to move fast
- You can easily get the composition wrong if you are not careful
6. Red Devil 0438 House & Home Restore 438 Pre-Mixed Tile Grout
Red Devil strikes once more with a high-quality tile grout – this time in a 5.5 fl. oz. tube. It is an acrylic-based grout that is easy to apply between the spaces of the tiles – particularly when you have such a convenient applicator tube. Plus, since it is pre-mixed, you will not have to worry that you get the composition or instructions wrong.
With this grout, all you have to do is point and squeeze – after which you use your finger to push the grout further into the tile line. Once you have done that, all that is left for you to do is to leave it to dry and use a sponge to level out the finish.
This grout is white in color – but if you wish to make it a more unique color, you may easily pour it out of the tube and mix it with some acrylic paint. This way, you can bring some style and color in your bathroom.
Pros
- Very easy to apply and to clean up
- Highly waterproof and with powerful sealing properties
- Perfect for re-grouting damaged areas
Cons
- Lines are fairly rough
- It’s prone to peeling
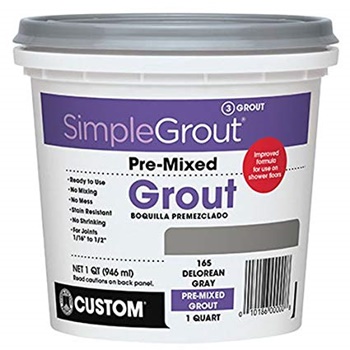
7. Custom PMG165QT 1-Quart Simple Premium Grout
If you are looking for a good premixed grout that is found in a bigger container, then this grout should be able to help you out. Found in a gray color but also available in a variety of other shades, it is perfect if you want to get creative with your bathroom.
The mix features a variety of advantages. It is stain resistant, which means that you will not have to deal with a great amount of maintenance – and it is also very resistant to cracking and shrinking, which means that it should last for quite a long time.
The grout is also resistant to water, which makes it perfect for the area in your bathroom and near the shower. It is also easy to apply, meaning that you will not have to be an expert in order to use it.
Pros
- Ready to use without prior mixing
- Great consistency that minimizes the risk for mistakes
- Great variety of colors
Cons
- The consistency is very porous
- The packaging is rather flimsy
Grout for Shower Buying Guide
 When you are buying grout for your shower, there are several things for you to keep in mind. Not only will this ensure that your shower area is well-kept, but it will also prevent you from having to re-grout your bathroom. Overall, here are a few things that you might want to consider.
1. Premixed vs. Regular Grout
No matter if you are going for sanded or unsanded, epoxy or cement, you should choose between regular and premixed grout.
As its name suggests, premixed grout comes ready for you to use it – and practically, the only thing that you will have to do is reach in the bucket and grab some of the composition. You won’t have to buy any other additions or solutions separately. You won’t even have to get water.
This premixed grout is a great solution if you are planning to use all of it right away. There is no chance of accidentally ruining the mix, and it will also save you quite a lot of time from the entire preparation process. So, it is a good option if you are not exactly confident in your grout blending skills.
However, regular grout is the more appropriate solution for most people, as it tends to give you particular freedom and preciseness. Granted, you will still have to follow the instructions on the box – but if you get it right, this kind of grout will have a finesse that will be impossible to achieve using premixed grout. You’ll just have to mix it properly.
Moreover, if you do not use the entire batch of regular grout, you may store and use it later on – even with the next re-grouting batch. If the grout is still solid, “powdery,” then you may easily store it in proper conditions and use it when the next grouting round is needed.
2. Mold Resistance
You may be purchasing grout for showers – but even if you do so, this does not mean that the product will be mold resistant. Keep in mind that the area where you will be adding your grout will constantly be splashed with water and will have to deal with a lot of steam as well.
For example, the closer you are to your shower fixture, the more mold resistant the grout will have to be. Say, for instance, that you only want to re-grout the floor tiles in the kitchen – in that case, you can go for something that has decent mold resistance.
On the other hand, if you are purchasing for your bathroom or shower – which we happen to know that you are – then you will have to buy something with high resistance to mold and mildew. Doing this will save you many headaches in the long run, and you will not have to continuously re-grout the place and scrub endlessly.
3. Waterproof
It might seem like the obvious thing, but not every shower grout is actually waterproof. Some are just water-resistant – which is similar, but not quite the same. This is why it’s vital to check whether your grout is waterproof or not – particularly if it’s your shower that you are tiling.
In this case, you might want to go for waterproof epoxy grout, as it is the ideal solution. It has quite a high resistance to moisture, and it tends to maintain that pristine look even after continuous water splashes. Check its water protection factor – and if you are using it for the bathroom, make sure that its waterproof level is as high as possible.
4. Sealing
When you are applying grout in the spaces between your shower tiles, you may or may not have to seal it. Some grouts will allow you to skip over this step, therefore saving from the remodeling process – but you will still have to choose the right kind.
Most of the time, epoxy grout is the main kind that will usually not require sealant. If it’s also unsanded, then it’s even better. Check for the product’s properties and see whether you have to purchase a sealant or not. In most cases, these details are found directly on the package.
5. Color
You want your grout to look good with the tiles, and you want things to match nicely. That is to say, you do not necessarily have to buy the same color as your tiles – but one that will look good next to it.
For instance, you may have white, clear tiles in a modern-looking bathroom – and your firth thought would be to use white grout to match the tiles. Granted, this will give a classic, elegant feel – but at the same time, it will be rather plain.
Now imagine that instead of using white grout, you’d be using red grout. It is quite a contrast since they are two totally different colors – but considering today’s modern designs, this is actually quite attractive. You just have to match it with something else in your bathroom – for instance, the toilet seat or the shower curtain.
Grouts nowadays tend to be sold in a variety of colors – so, depending on your bathroom, you may choose the one that you prefer the most. Bear in mind that the grout sold in lighter colors tends to get dirty much easier. So, while it might be good for less water-exposed areas, it may not work on the floor or directly in the shower. It may get dirty relatively fast, which means you will have to re-grout quite often.
6. Curing Time
Depending on the manufacturer, each grout will feature a different curing time. Some products will take as much as 12 hours to be completely cured, whereas others may need only as little as 4 hours. If you are low on time and need to finish the bathroom modeling quite fast, make sure that you do not buy a type of grout that takes half a day to cure.
This information is generally found on the fine print of the product. Some manufacturers attach it to the back of the bag, whereas others give separate slips that you may read prior to purchasing. Make sure that you read before clicking the “order” button – otherwise, you may end up having a very unpleasant surprise.
7. Maintenance
Not many people think about this aspect very often – but cleaning the shower grout is also something that you need to keep in mind. Shower grout will be exposed to quite a fair amount of water, which means that it will also go through frequent cleaning. Consequently, you’ll have to use quite a bit of cleaning products – which may end up damaging the grout in the long run.
Make sure that when you purchase the grout, you go for something that can stand the cleaning solutions that you generally use in the shower. To be on the safe side, you might want to purchase special grout solutions – particularly the one recommended by the manufacturer. You might also want to check the fine print of your go-to cleaner and check whether it’s safe for your grout or not.
There are two ways for you to go here: first, you may stick to your grout of choice, and then pick out a good and safe cleaner for it. Secondly, you may keep the cleaner – and then pick a grout that you know for sure can withstand the chemicals in your cleaner. However, the first solution is generally the most convenient one.
How to Grout a Shower
 Grouting a shower is a crucial part of making your bathroom look nice and modern. Without it, the place will look unrefined – which will also apply if the procedure is not done correctly. From the very beginning to the very end, here are all the steps that you have to take in order to grout a shower.
1. Pick the Grout
First things first, you will have to pick the grout that you are planning to use in your bathroom. What color is it going to be? Is it going to be sanded, or do you want to go for the unsanded version? Pick one in accordance with your budget and bathroom style, after which you may move on to the next step.
2. Remove the Old Grout
Unless you have freshly tiled your shower and do not already have grout, you will have to remove the old grout. The new one won’t stick unless the old one is gone, which is why you will have to use a grout removal tool to remove the compound. Once this is done, make sure that you remove all dust, dirt, and debris before you start grouting again. If you just tiled the place, wait until the thin-set mortar has cured. You can also see detailed steps for removing your old grout.
3. Mix the Grout
You picked the grout – but this doesn’t mean that it’s ready to be used. You will have to mix it first. Look at the instructions on the package and mix the right amount of water with the right quantity of powder grout. Mix until all the grout is dissolved and that there aren’t any lumps forming a semi-solid mixture. The final result should look and feel something like peanut butter.
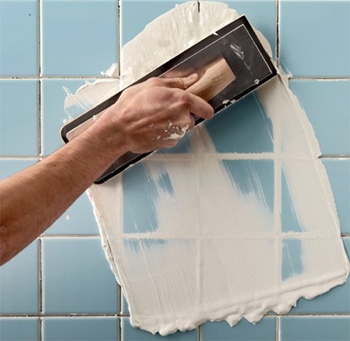
4. Apply the Grout
Curve the bucket where you have mixed the grout in your direction and use the float to take some of the grout. Don’t take too much on the first go, as it might fall off and stain the tiles.
Start by applying grout between the tiles of the walls, and then move on to the floors. Apply the grout diagonally and push it through the joints. On a vertical surface, you have to apply it in an upward direction. Once it has been applied, compress the grout with pressure.
5. Remove the Excess Grout
You may want to remove the excess grout with your float as quickly as you can before it has the chance to dry out. There are several reasons for that. First, you do not want to waste grout, as you may need that “extra” to fill any remaining joints. And secondly, if you leave too much and it dries, it will be far more difficult to clean off. At least, when the “bulk” has been removed, all you will need are a couple of wipes.
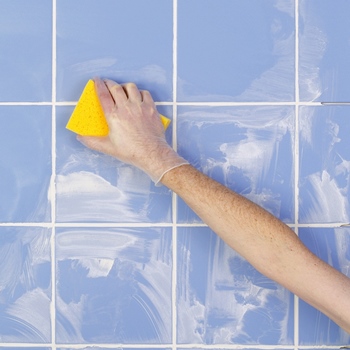
6. Clean the Tile Surfaces
After you left the grout to dry for at least 20-30 minutes, you should use a sponge to clean the surface of the tiles. Ideally, you should use a hydrophilic sponge – and not the regular ones that you usually use in the kitchen. After every wipe, make sure to rinse the sponge and reapply it a few times until the tiles are clean. So as to not ruin your whole work with the grout application, make sure that the sponge is not too wet.
7. Smoothen the Grout Lines
With the tiles now clean and in good shape, it is time for you to smoothen the grout lines. Use the sponge and gently press it on the lines using your index finger. Make sure that you don’t press too hard, because you might end up taking too much of the grout, peeling it off the joints.
8. Let the Grout Dry
Once the cleaning task is over and done with, it’s time to let the grout dry completely. Do not touch it for at least half an hour. Once it is dry, take a towel to clear the tiles of the remaining haze. For better results, you may want to use a microfiber towel.
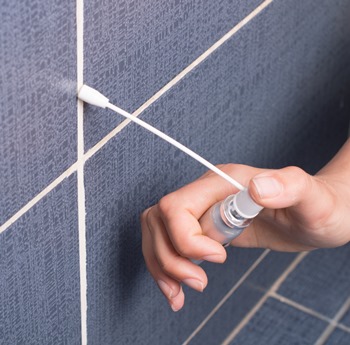
9. Seal It
If the grout that you have chosen requires a sealant, this will be your last step. This might take up to a few days, depending on the directions given by the manufacturer. Once the grout has cured, pour some sealant on the lines and work it around with a sponge, using circular motions.
Time may vary, but in most cases, you may want to wipe off the sealant after around 5-10 minutes. Keep the windows cracked so that there is enough ventilation in the room.
You can also check further tips to grout a shower.
FAQ about Shower Grouts
1. How Often Will I Have to Reseal the Grout?
This will depend on the sealant that you use, as every manufacturer will have different instructions. Ideally, you may want to reapply the sealant once every few months. This way, you will ensure that the grout does not lose its protective properties and the moisture is kept away from going underneath the tile.
2. Can I Use Sandpaper to Remove the Excess Grout?
No, you should not use sandpaper to remove the excess grout. Not only may you end up removing too much grout, but you may also remove the sealant that covers the tile. You might want to use a soft sponge instead, as it will not damage the tile itself.
3. Can I Apply New Grout Over the Old Grout?
The short answer for that would be: no! Many people do this, and they skip over the process of removing the old grout, as it is a very time-consuming task. However, there is a very high chance that the new grout won’t stick to the old one – and the entire thing might end up peeling off in just a few days. You would have wasted time applying grout – and it would all be for nothing.
4. Can I Clean the Dirty Grout Instead of Removing It?
Yes, you don’t have to remove the grout each time it gets dirty. However, you need to be careful about what products you use to clean it. If there is minor fungal growth and staining, you can get a specially formulated grout cleaner that will not damage the grout. Make sure not to scrub too hard either, as you might end up peeling the grout off.
5. What Kind of Grout Should I Use Near the Shower?
Both types of grouts can be used near the shower – but if you plan on grouting around the top-rated shower valve, where things tend to get rather wet, then you might want to go for epoxy grout instead of the cement kind. This grout is more resistant to water – and since it acts as a natural sealant, you will not have to seal it as often.
6. Can I Add More Water to the Grout to Make It More Manageable?
A common mistake that people make is adding more water into the grout than it has been recommended. However, this can affect the grout in more than one way. First, it might make the grout much more fragile and easier to peel – aside from the fact that it will dry off very slow.
Secondly, it will dilute the color. If you purchased a nice, red grout, there is a high chance that it might end up pink after diluting it too much.
7. How Long Should I Wait Before Applying the Grout?
If you’ve had the same tiling for a while, and all you are doing now is re-grouting the space between the tiles, then you may start as soon as the old grout has been removed. However, for the grout to stick, make sure that space, where you are grouting, is clear of any debris.
On the other hand, if you have also changed the tiles, then you will have to wait at least 24 hours. This will allow for the tinsel to dry and cure so that the humidity does not get trapped underneath. On the other hand, if you are going for plank tiles, you will have to wait for at least 72 hours.
Wrap Up
Always be very careful when you are choosing the grout for your shower area. While we did bring some of the most convenient solutions for you, there are instances when the most popular option might be the least convenient for some people. You should choose the best grout for shower based on your bathroom, your skill, and your particular preferences.
Hopefully, our article allowed you to make a calculated choice. We hope our reviews were useful and that our tips were able to steer you more in the right direction. The most important aspect here is to check that product that has all the right features. With the right chance, you will not need any re-grouting anytime soon.
Thanks Noah, this information sheet was a great help!
Thank you! This article is informative and answered every question one could have concerning grout.